Easy Woodworking Projects for Beginners: 8 Builds With a Saw, a Drill and a Square
Straight cuts, screwed joints and lumber from any home center. Here is what each project needs and what it teaches you.
You don't need a full shop to build useful things. With a saw, a drill and a square you can build most of the projects people actually use around a house and yard. The trick is picking a first project that forgives small mistakes and teaches the habits you will use on every project after it.
What makes a project good for a beginner
- Straight cuts only. Square crosscuts and a few long cuts, no curves or compound angles.
- Screwed butt joints. One board screwed to the face or end of another. No joinery to learn first.
- Stock lumber. 1x and 2x boards you can buy already planed, in the sizes the plan calls for.
- Forgiving size. A garden bed that is 1/16 inch out of square still works. A drawer that is 1/16 inch out does not.
The three tools, and what each one does
A saw cuts boards to length. A circular saw handles almost everything here; a miter saw makes repeat crosscuts faster and squarer; a hand saw works for small projects. A drill/driver drills pilot holes and drives screws. A speed square marks square lines and guides a circular saw for a straight cut. Add a pair of clamps when you can; they hold work still so both hands stay on the saw.
8 beginner projects at a glance
| Project | Typical lumber | Cuts | What it teaches |
|---|---|---|---|
| Raised garden bed | 2x6 or 2x8 boards, 4x4 corner posts | Square crosscuts | Square corners, pilot holes |
| Planter box | 1x6 cedar boards | Square crosscuts | Working to actual board sizes |
| Simple workbench | 2x4 frame, plywood top | Square crosscuts | Building a square frame |
| Step stool | 1x10 or 1x12 pine | Crosscuts, one notch | Measuring and layout |
| Shoe bench | 1x12 boards, 2x2 cleats | Crosscuts | Shelves that sit level |
| Outdoor bench | 2x4 and 2x6 | Crosscuts | Strong screwed joints |
| Dog house | Plywood, 2x2 or 2x4 framing | Crosscuts, roof angle | Your first angled cuts |
| Picnic table | 2x6 and 2x4 | Angled leg cuts | Matching pairs of parts |
1. Raised garden bed
Four sides, four corner posts, a few dozen screws. Use a naturally decay-resistant wood such as cedar, or treated lumber rated for ground contact, because the boards will sit in damp soil. Drill pilot holes near board ends so the screws don't split them.
2. Planter box
A small box from 1x6 boards is where most people first meet the "¾-inch board" problem. If the plan says the box is 12 inches wide, check whether that number was drawn with ¾-inch or 1-inch boards. Our lumber size chart has the numbers.
3. Simple workbench
A 2x4 frame with a plywood top gives you a flat place to build everything else. It teaches the most useful skill in the list: building a rectangle that is actually square. Measure the two diagonals; when they match, the frame is square.
4. Step stool
Two sides, a step and a top from one wide board. Small enough to finish in an afternoon and useful in any kitchen or bathroom. Round over the edges with sandpaper, since hands and feet will touch every corner.
5. Shoe bench
A bench with one or two shelves underneath. Screw cleats to the inside of the sides so the shelves sit on them, and mark both sides together so the shelves come out level.
6. Outdoor bench
A backless 2x4 and 2x6 bench is a good first outdoor build. Use screws rated for exterior use, and for a longer life, choose a durable wood or paint it (more on that in our wood moisture and finish notes by state).
7. Dog house
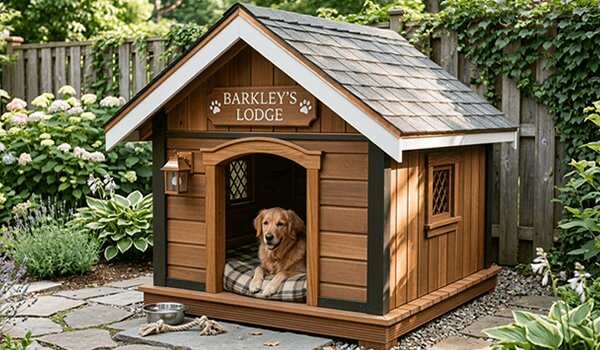
Plywood walls on a light frame, with a sloped or peaked roof. The roof is your first angled cut. Set the angle on the speed square or saw, cut one test piece and check it before cutting the rest.
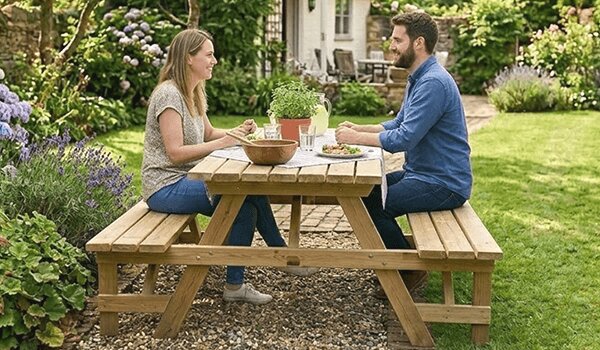
8. Picnic table
The biggest project on the list, but the same skills: crosscuts, a few angled leg cuts and lots of screws. Cut the legs as matched pairs, and get a second person to help with the assembly.
First-project habits worth learning
- Square one end of every board before measuring; factory ends are rarely square.
- Mark the length, draw the line with a square and cut on the waste side of the line.
- Cut one part, check it against the plan, then cut the rest.
- Drill pilot holes near board ends, and countersink so screw heads sit flush.
- Dry fit the parts before you drive the final screws.
- Use exterior-rated screws for anything that lives outside.
- Sand the edges people will touch before you finish the project.
If you want a short list with photos, we picked seven of these weekend builds in 7 Weekend Projects You Can Build With a Saw, a Drill and a Square.